All of us at Ceres Chill is delighted to share this epic review from Verified Purchaser Renee!

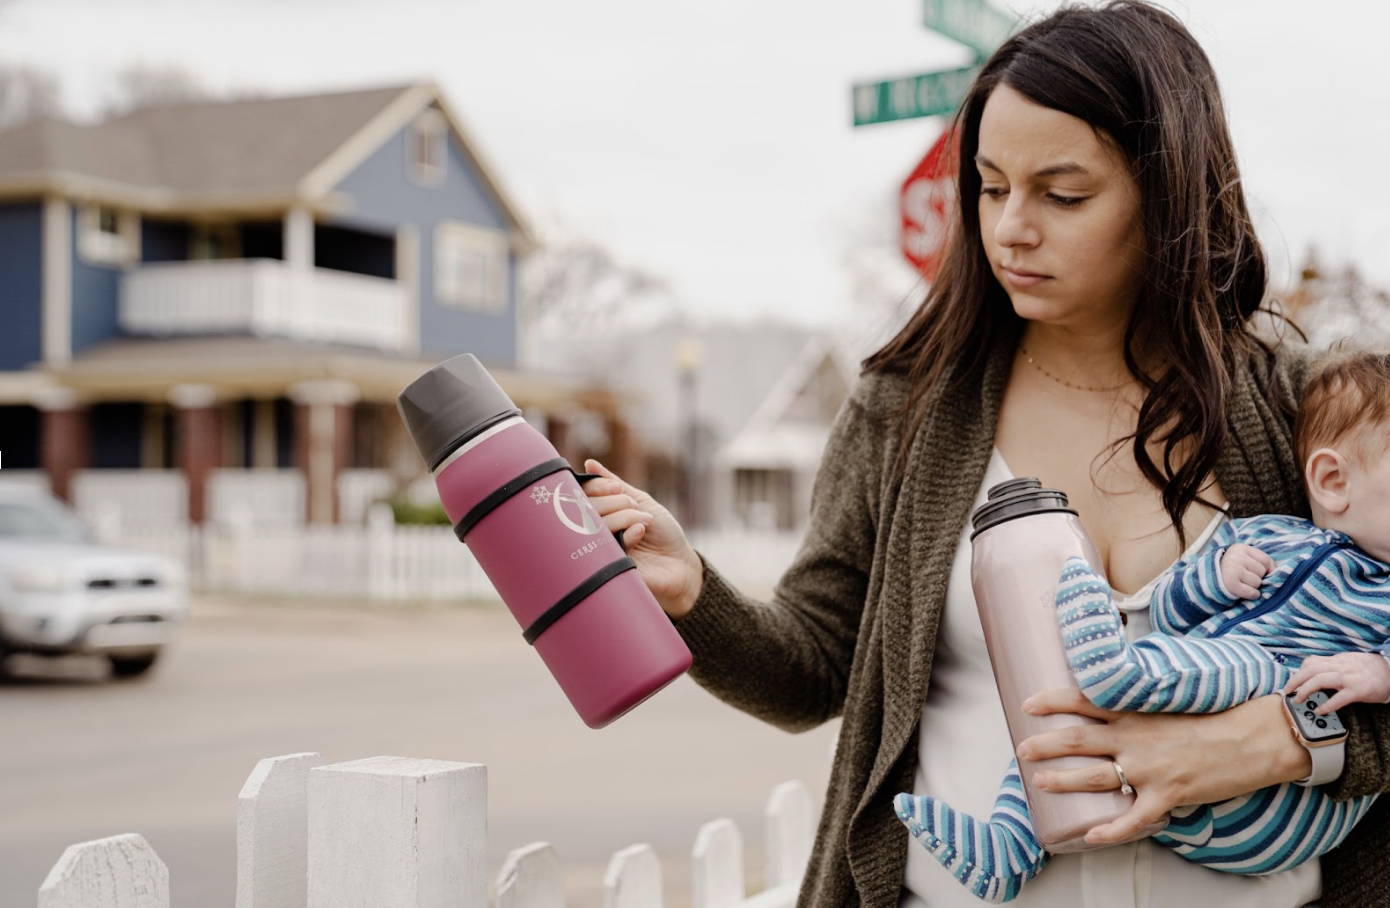
Photo by Mariel and Joey Lifestyle Photography
Pseudo-scientifically tested!
I’ve been watching this company for a couple years now, since before the birth of my son. Now that I am two months postpartum I thought that would be an excellent time to FINALLY treat myself to a Ceres Chill. Love that the company offers a 20% discount for first responders if you verify yourself through Gov-X; if you’re not one, fear not: it seems pretty common to be able to get 15% off if you do some digging or go on their email list.
TL;DR for the On-the-Go Mom
🧪 Verified buyer Renee put the Ceres Chill through serious temperature tests — heating, cooling, and real-life use cases — with fancy thermometers and timed experiments.
🔥 Hot water in both chambers keeps formula-ready temps (170°F+) for up to 2 hours — perfect for on-the-go mixing!
♨️ Used as a bottle warmer, it maintained near body temperature for about 19 hours. Long-lasting warmth, check!
❄️ Cold mode with a frozen inner chamber kept milk under 40°F for an impressive 36 hours, and under 45°F for nearly 48 hours — perfect for road trips and camping.
🥶 Quick-pump setup had some quirky results likely due to ice type and storage upside-down, so your ice style may affect chilling performance.
🔍 Renee suggests adding ounce markings inside the inner chamber for easier measuring and a silicone sleeve for kid-friendly sipping — features that’d make the chiller even better.
🙌 Overall, she’s super impressed — calls it a multi-use thermos, loves the design and customer service, and recommends grabbing one if you’re on the fence.
💦 Bonus: Condensation “diluting milk” claims? Likely user error. With the chiller closed properly, condensate is minimal.
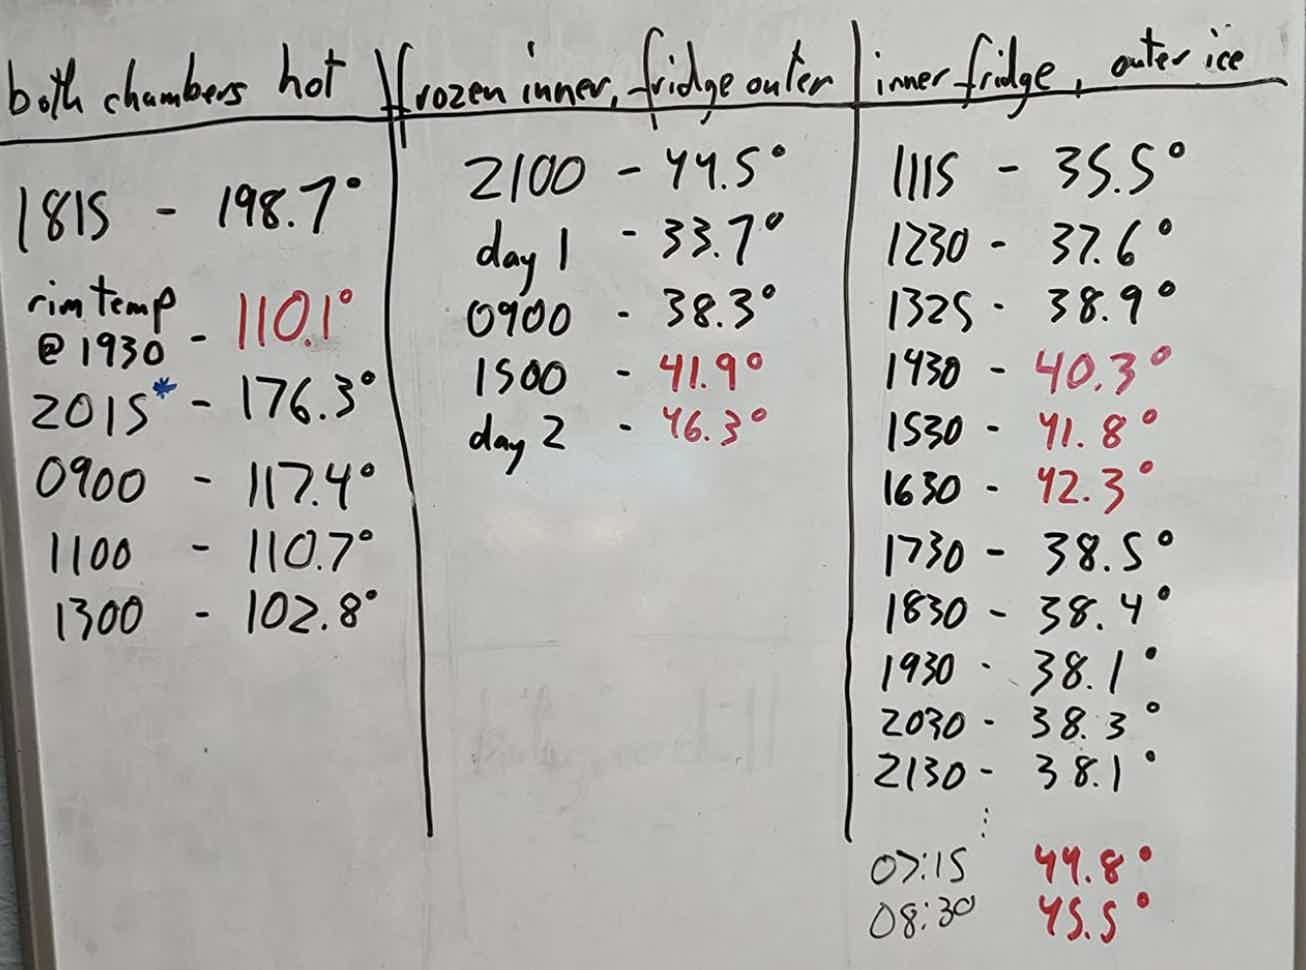
Now for the meat of the review — and be warned, it is long. I really wanted to put it through its paces and test it out. The whole chiller just seemed so thoughtfully designed, it seemed important to validate performance. I suppose I’m just that "experiment and read ALL reviews" type, lol. :) There were four “use cases” I could see myself taking advantage of, so I recreated those conditions and did timed temp checks with a calibrated probe thermometer and, in one case, an infrared one. Scenarios were:
- Longest heat maintenance: filling the outer and inner chamber with near boiling water. This is in order to mix formula on the go without having to ask for hot water at a restaurant, gas station etc. For this it had to maintain greater than 170°F for the formula we use.
- Bottle warmer: a continuation of the previous experiment. To use this mode one would pour their milk into a standard neck glass baby bottle, thread it onto the connector in place of the inner chamber, then lower the entire assembly into the outer chamber. How many hours out would the chiller hit body temperature?
- Longest cold maintenance: a frozen solid inner chamber with fridge temp liquid in the outer chamber. This scenario would probably be what I would use for road trips or extended trips away from my baby. With minimal opening the chiller how long would the outer chamber maintain 40°F or less? Side note: the Ceres Chill documentation uses 45°F as the benchmark temp, CDC recommends 40°F. I don’t have a dog in the fight of which temperature is ideal; that’s simply not my background of expertise. Honestly, if either temp is good for inhibiting microorganisms’ growth it’s fine with me, so I will give both of these measurements.
*Note from Ceres Chill - We don’t recommend freezing the inner chamber of our Legacy Chiller due to the risk of damage. Although rare, it can cause the bottom to round out over time. BUT, we’ve made some exciting updates, and our OG+ now supports worry-free freezing capabilities with its freezer-safe chamber!
If you're unsure which chiller model you have, or if you're interested in upgrading your legacy inner chamber for safe freezing, feel free to reach out to us at info@cereschill.com. We’re happy to help!
- “Quick pump” scenario: fridge temp liquid in inner chamber, ice cubes with “a splash of water” in the outer chamber. This is mimicking what I’d do if it were a short trip (ie. I’m filling only enough for the inner chamber) or I was going through TSA (since I could dump the ice in the outer chamber, go through TSA, and get ice before my gate). Since I am a “just enougher,” this would be the storage method I would use. Or so I thought! It’s recommended that if the inner chamber doesn’t reach the ice water, that the chiller be stored upside down: presumably so that the inner and outer chambers maximize contact within the chiller.
I’m adding the pic of the results for your perusal; sorry if it's unclear as I wasn't initially going to write a review. I only opened the chambers to take temps so as not to influence the results too much.
Here are some interesting tidbits/summary notes:
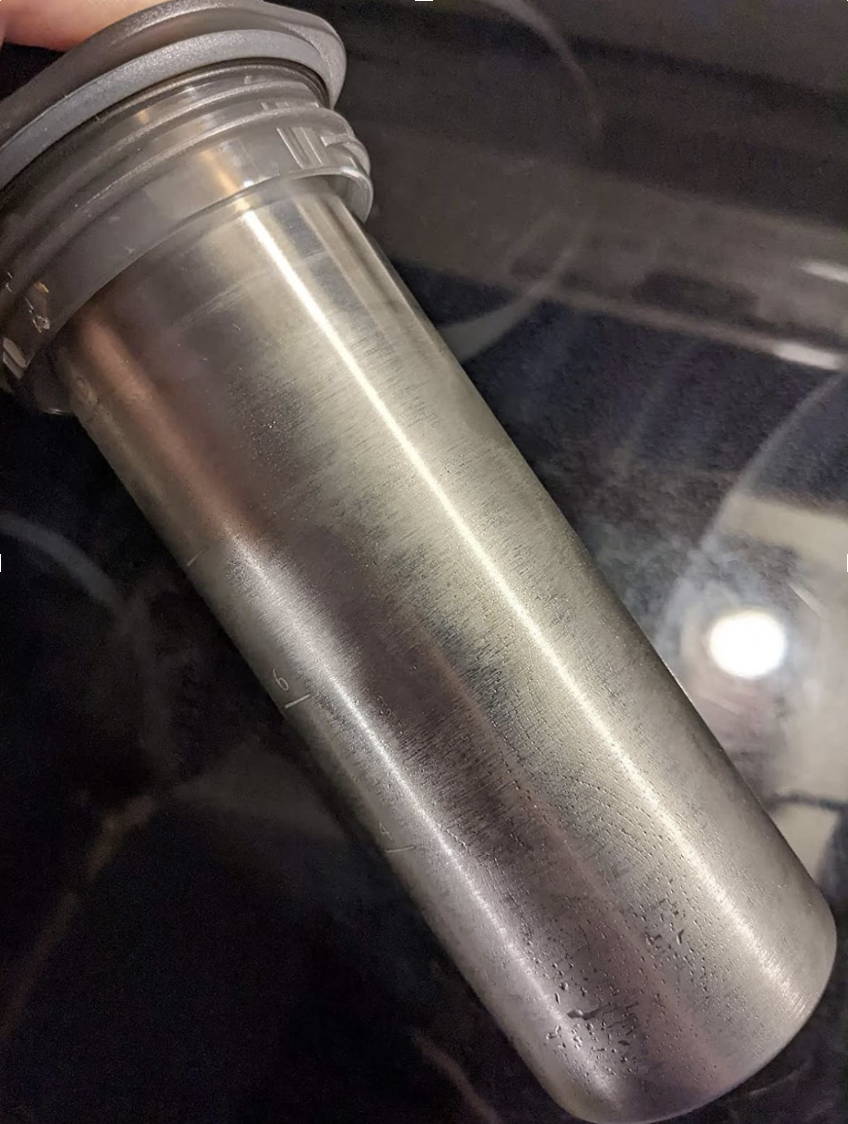
- I’d feel comfortable putting 200°F water into both the inner and outer chiller for heat longevity, and mixing formula out of that on-the-go for up to two hours. Don’t turn your connectors too tight when it’s this hot to prevent an unpleasant unscrewing experience (ask me how I know). Secondly, and purely accidentally, I found that the exposed silver band at the top of the chiller (the outer chamber “liner” that spills over the lip of the chiller, so to speak — see second pic for clarification), conducts heat in a SURPRISING way using this method. I was getting infrared temps of roughly 110°F at the band one hour out, so be careful when you unscrew the connector to use the water. I don’t think it’s hot enough to scald skin with brief contact, but definitely hot enough to jerk your hand back if you’ve put your chiller into a purse and brushed against it accidentally. Or, your kids touch it for a prolonged time.
- As a bottle warmer: the hot water registered a feverish body temp at 19-ish hours. That’s a decent utility time. Our baby takes cold milk and formula so this experiment isn’t as useful to us, but it was fun to know.
- With a frozen inner chamber, refrigerator temp liquid in the outer chamber (~36°F for my fridge) to the max fill line will maintain less than 40°F comfortably for a staggering 36 hours, and under 45°F for just shy of two days. Damn! I was seriously surprised at this result. I expected a much shorter length of time if I’m being honest, and I would’ve been okay with even that. Really impressive result here. That’s, like, “would be fine going camping” levels of chilling. This alone is worth the price of admission.
- I was perplexed with the “quick pump” scenario results, and I have a theory why it came out so weird. Our freezer makes the square, blocky kind of ice, so I filled the outer chamber with as many as I could (that is to say: not that many cubes). The problem was that when screwed in, the bottom of the inner chamber sits too closely to the bottom of the outer chamber to accommodate even what I thought was a smallish amount of ice. Worse yet, when you put a “splash” of water on top of the ice, the ice refreezes into a solid block which makes it nearly impossible to seat/thread the inner chamber correctly. If any part of that ice sticks up into where the inner chamber is supposed to be, hoo buddy, prepare yourself for chipping away at that! I imagine this problem would go away with familiarity with the chiller. Here’s where the test results got strange. I stored the chiller upside-down per recommendation, temped the inner chamber every hour, then reset it upside-down again. You’ll notice a steady rise in temp for nearly five hours as expected. Then, at hour six-ish, the inner chamber temp dropped *significantly* back down into the 30s where it stayed — until rising above 45°F at 22 hours out. 22 hours is pretty damn close to the claim Ceres Chill makes at keeping stuff cold until 20 hours. But why the unusual temp drop?
I’d need to test it again, but my working theory is that when the chiller is stored upside-down, the ice water in the outer chamber does indeed flow to the bottom as you’d expect. The ice however (especially the kind of ice that we have) does NOT: staying trapped at the now top of the chiller. There it melts down into the rest of the ice water, until the point where the blocky ice gets small enough to sssssslide between the inner/outer chamber walls and, then, start effectively cooling again. Hence, the temp drop. Again, I’d need to test this further, but it’s interesting to note that the KIND of ice you have may actually play a significant role in how well your milk gets chilled using this method. I imagine this would change if you had the crescent kind of ice or, lucky you, the little airy ball kind that’s so satisfying to chew. Short story long — especially if you’re the type that cares about the line between 40°F and 45°F - your own further personal experimentation is warranted.
Probably the biggest suggestion I could add is the following: please etch ounce markings on the *inside* of the inner chamber. There are hashes on the *outside* of the inner chamber, but as it’s stainless steel there’s no way of knowing how much liquid is contained inside with any degree of accuracy. As it is, you need a secondary container with markings to measure volume, which seems … I don’t know, anomalous given how well-considered the rest of the chiller’s design is. How much more useful it would be to pump directly into the inner chamber if you could tell! How easy it would be to NOT overfill the inner chamber if you use the “freeze the inner chamber” method! Seeing as how the outer chamber has a “max fill line” stamped into *it,* maybe it wouldn’t be too much more hassle to add this to the manufacturing process? This would elevate the daily chiller use from “great” to “nothing left to complain about”, for me. Well, that, and adding a silicone sleeve that will slip over the inner chamber bundled with the “happily ever after” set would make the BEST sippy cup combo for kids! I suspect the Lifefactory 9 oz. baby bottle sleeves would work, but I’d love a Ceres Chill branded one.
All in all, I am SO pleased with the performance and can see myself using this in so many ways, even long after the feeding your children part is finished. It makes a fine thermos as is - there’s no dual-chamber one on the market as far as I can tell. This really increases its utility. Daresay, one may be able to sneak outer chamber fluid into, say, a music venue after dumping the inner chamber stuff at security. Not suggesting it, just sayin’. ;) Or use the outer chamber to store like a frozen slushy kind of drink … the possibilities are wide in scope. I do think this company is one to watch for further innovation in the breastfeeding accessories market, and I’m curious to see where they end up going. When I had a problem with my order unrelated to the chiller, the CEO/owner Lisa reached out and personally made it right despite it being a hectic time running a crowdsourcing campaign. Mad respect for that.
If you're on the fence: get one. This chiller has integrated pretty seamlessly into my life and I'm constantly finding new utility for it, and the Greek mythology reference is charming. I hope it does the same for you.
{edit}: I also wanted to address the review claiming that ice left in one chamber while leaving the other chamber empty will cause condensate to form, thus "diluting" your milk. As I understand it, condensation occurs here when water vapor in the surrounding atmosphere comes into contact with a cold surface, the vapor then cooling rapidly and releasing the water stored onto that surface. I say that because I was unable to replicate a worrisome amount of condensate forming EXCEPT by making the chiller open to air, which... yeah, no person would do this, especially filled with milk. If you leave the empty chamber open to air then, of course, you'd be condensing the droplets in THAT air. But if you close the chiller, as intended, the only air that'd be in contact with the ice chamber is that which is only inside the chiller. You'd also be dealing with far less surface area for condensate to form on, as you'd be storing milk. After experimentation with icing both inner and outer chambers independently with a closed chiller I feel safe saying this was likely user error, as I got very little condensate (see the picture of a frozen inner chamber taken from an empty outer chamber). If this scant amount might matter to you, as always, feel empowered to experiment on your lonesome and make the chiller your own. :)
Visit our science page for more cool information like lab tests and consumer safety reports!